Page 1 of 4 1234 LastLast
Results 1 to 10 of 37

Thread: Question to PRO SHOP OWNERS, about bowling ball surface1

  1. #1
    Bowling God MICHAEL's Avatar
    Join Date
    Apr 2012
    Location
    kansas ctiy missouri
    Posts
    5,433
    Blog Entries
    1
    Chats: 2643

    Default Question to PRO SHOP OWNERS, about bowling ball surface1

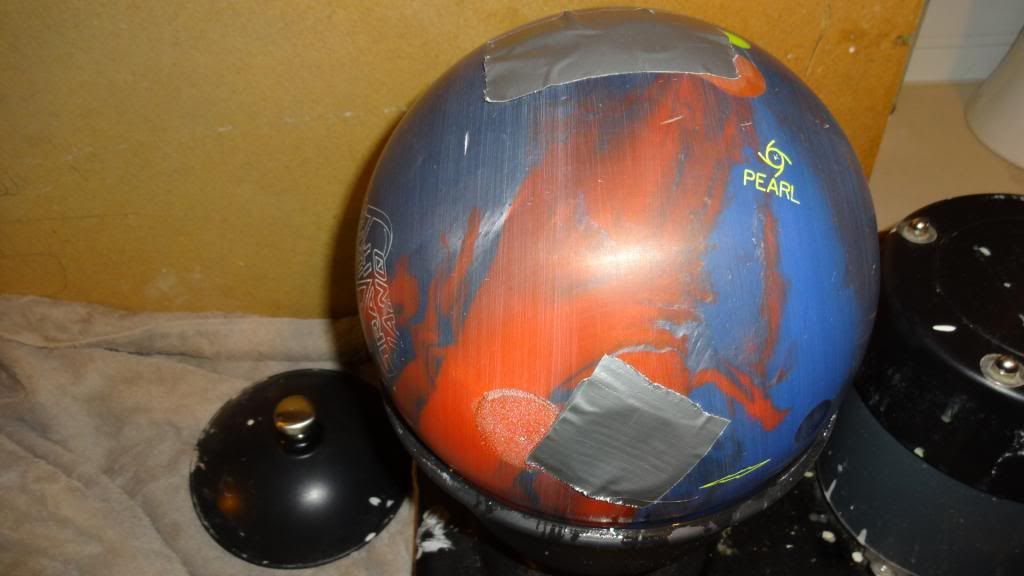
    I really didn't notice it until I took a picture! I do the four positions of ball on spinner!

    1. thumb hole straight up!
    2. thumb hole straight down!
    3 ring finger hole up
    4 ring finger hole down

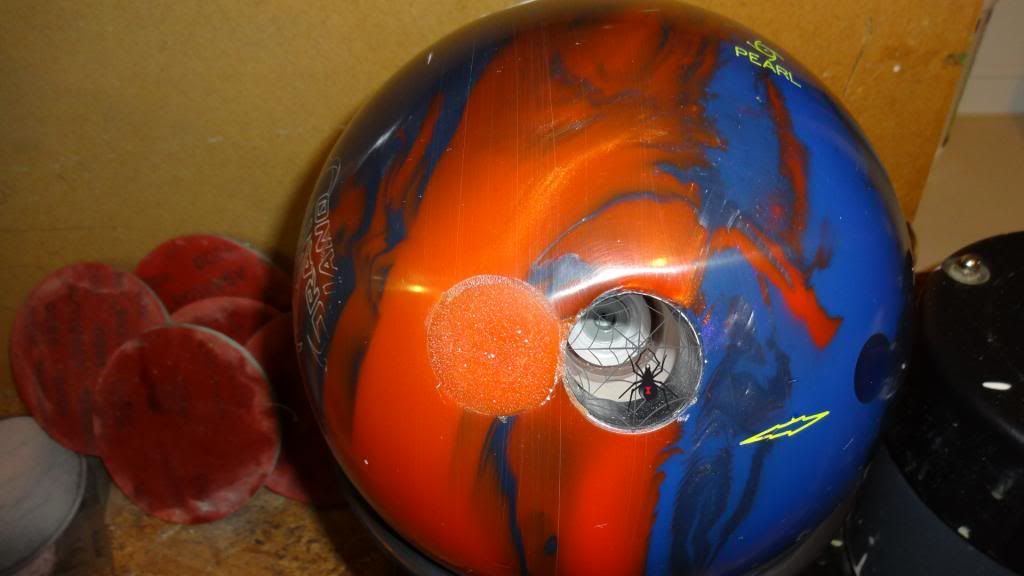
    after doing this, I noticed after taking a picture of my ball that you can see the lines going circular around the ball, as I guess you would expect using a spinner!

    My question is should a person, to disrupt the straight lines going around the ball, ruff it up by hand with the last pad used 1000 grit ,,before putting on the, (in my case Reacta shine by storm), that should take it down to 1500!

    I am shooting for as close to out of box as possible, and since I don't have a 1500 pad, and the Reacta Shine is suppose to clean polish and leave a 1500 finish on the ball I used it as a finale step..

    What could, or am I doing wrong??

    Last edited by MICHAEL; 10-09-2013 at 12:14 PM.
    Don't walk on Thin Ice!

  2. #2
    Super Moderator
    bowl1820's Avatar
    Join Date
    Dec 2008
    Location
    Central, Florida
    Posts
    6,713
    Blog Entries
    12
    Chats: 554

    Default

    Well not a Pro shop operator, But I've spun a few balls over the years.

    First 1000 abralon is not the last grit before the polish in a 1500 grit surface, 1000 abralon is around 500-600 grit.
    Your seeing all those lines because its too course.

    These are the steps to get a 1500

    1500-grit Polished Factory Finish
    1. 500-grit Abralon® – Sand firmly for 30 seconds on all four sides.
    2. 1000-grit Abralon – Sand lightly for 20 seconds on all four sides.
    3. 2000-grit Abralon – Sand lightly for 20 seconds on all four sides.
    4. 4000-grit Abralon – Sand lightly for 20 seconds on all four sides.
    5. Storm® Step Two™ – Polish lightly for 15 seconds on each side.

    (Now you can sub. Rough Buff for the Step 2)

    Also:
    "1. thumb hole straight up!
    2. thumb hole straight down!
    3 ring finger hole up
    4 ring finger hole down"

    Say what?

    Here are the 4 sides of the ball.

    Last edited by bowl1820; 03-13-2014 at 05:41 PM.

    Right handed Stroker, high track ,about 13 degree axis tilt. PAP is located 5 9/16” over 1 3/4” up.Speed ave. about 14 mph at the pins. Medium rev’s.High Game 300, High series 798

    "Talent without training is nothing." Luke Skywalker

  3. #3
    Super Moderator
    bowl1820's Avatar
    Join Date
    Dec 2008
    Location
    Central, Florida
    Posts
    6,713
    Blog Entries
    12
    Chats: 554

    Default

    As a side note I like about a 1500 grit surface most of the time on the house shot here.

    What I do is, I sand (4 sides) with 800 grit wet/dry paper (which would be between 1000 & 2000 abralon), then apply a light coat of polish.

    To me this gives a reaction closer to the org. OOB 1500 surface.

    Another option I use is instead of "polish" is Using "Soft Scrub "without bleach in it") on a sponge. This can give a nice sheen surface.

    Right handed Stroker, high track ,about 13 degree axis tilt. PAP is located 5 9/16” over 1 3/4” up.Speed ave. about 14 mph at the pins. Medium rev’s.High Game 300, High series 798

    "Talent without training is nothing." Luke Skywalker

  4. #4
    Bowling God MICHAEL's Avatar
    Join Date
    Apr 2012
    Location
    kansas ctiy missouri
    Posts
    5,433
    Blog Entries
    1
    Chats: 2643

    Default Thanks for the information....

    thanks for the information!! Wow,,, I thought that a 1000 abrasion pad was a 1000 grit?? I will use the resurfacing you posted.. This might end up being a game changer for me!
    I have been using the spinner to clean every night after bowling! It works great, but now I see what few times I have resurfaced, I have not only been WRONG with the Grit, but also spinning it WRONG!

    Back to the spinner with the Nano Pearl!!
    Don't walk on Thin Ice!

  5. #5
    Bowling God MICHAEL's Avatar
    Join Date
    Apr 2012
    Location
    kansas ctiy missouri
    Posts
    5,433
    Blog Entries
    1
    Chats: 2643

    Default Now I am confused help

    Quote Originally Posted by bowl1820 View Post
    As a side note I like about a 1500 grit surface most of the time on the house shot here.

    What I do is, I sand (4 sides) with 800 grit wet/dry paper (which would be between 1000 & 2000 abralon), then apply a light coat of polish.

    To me this gives a reaction closer to the org. OOB 1500 surface.

    Another option I use is instead of "polish" is Using "Soft Scrub "without bleach in it") on a sponge. This can give a nice sheen surface.

    hummm now you throw this at me!!?? If you look at the pictures I posted, that was a 1000 abrasion pad, only thing I did wrong was method of sanding position of ball. So you are saying If I do your method to get the 1500 surface,

    1. use a a 1000 or 2000,,, I don't have a 1500, and the correct postion of ball for the 4 side surfacing

    2. use the Reacta Shire,,,, (which is as I remember a 1500 polish combination)


    Remember now the picture I posted was after using a 500 with pressure, then 30 seconds,,, then a 1000 light pressure for 15 seconds, then Reacta Shine.
    And you can see the groves in the ball.....

    To the naked eye, it did not show, but I noticed the camera really showed the groves..

    Ok the above is what you do for a out of box 1500,,,, with only two steps..
    in your tread before that you said go through many more steps??? which is right??? LOL
    Don't walk on Thin Ice!

  6. #6
    Bowling God MICHAEL's Avatar
    Join Date
    Apr 2012
    Location
    kansas ctiy missouri
    Posts
    5,433
    Blog Entries
    1
    Chats: 2643

    Default Ball looks MUCH BETTER !!!


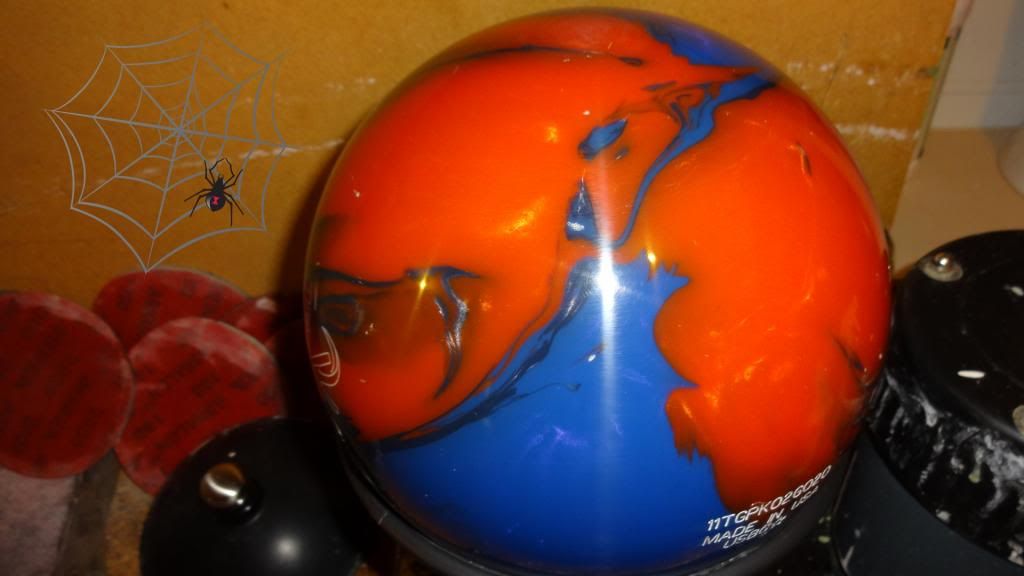
    Ok,,, did the method you mentioned and position of ball as you showed in picture, also followed the timing, and heavy touch, and light touch! Ball looks a hell of a lot better then the ICEMAN method... (:/

    Which looks better LOL.... First picture, or second... thanks for the advice
    now to do the IQ pearl with the 1500!!
    Last edited by MICHAEL; 10-09-2013 at 02:54 PM.
    Don't walk on Thin Ice!

  7. #7
    Super Moderator
    bowl1820's Avatar
    Join Date
    Dec 2008
    Location
    Central, Florida
    Posts
    6,713
    Blog Entries
    12
    Chats: 554

    Default

    Quote Originally Posted by MICHAEL View Post
    hummm now you throw this at me!!?? If you look at the pictures I posted, that was a 1000 abrasion pad, only thing I did wrong was method of sanding position of ball. So you are saying If I do your method to get the 1500 surface,

    1. use a a 1000 or 2000,,, I don't have a 1500, and the correct postion of ball for the 4 side surfacing

    2. use the Reacta Shire,,,, (which is as I remember a 1500 polish combination)


    Remember now the picture I posted was after using a 500 with pressure, then 30 seconds,,, then a 1000 light pressure for 15 seconds, then Reacta Shine.
    And you can see the groves in the ball.....

    To the naked eye, it did not show, but I noticed the camera really showed the groves..

    Ok the above is what you do for a out of box 1500,,,, with only two steps..
    in your tread before that you said go through many more steps??? which is right??? LOL
    The steps I posted above are the steps recommended by Storm to return a ball to a Factory 1500 grit surface.


    As for the steps I used, The balls I use came with a OOB of 1500 and I liked how they reacted with that surface.

    So when I was redoing the surfaces, when I did the recommended way. I felt the ball was going to long compared to the org. surface afterwards.

    So I tried making adjustments to the steps to try and get the original reaction I had and I found the steps I did above, gave "me" the same reaction I had with the original OOB surface on the ball.

    I guess what I want to say is, I wanted match the reaction of the org. surface, not necessarily the org. surface grit. And that's what I came up with.

    I'm not saying you have to do that, just that I offered it as a option if the other doesn't give you what you want.

    When I get a chance here in a little bit I'll post a pic of my ball done my way.

    Right handed Stroker, high track ,about 13 degree axis tilt. PAP is located 5 9/16” over 1 3/4” up.Speed ave. about 14 mph at the pins. Medium rev’s.High Game 300, High series 798

    "Talent without training is nothing." Luke Skywalker

  8. #8
    Super Moderator
    bowl1820's Avatar
    Join Date
    Dec 2008
    Location
    Central, Florida
    Posts
    6,713
    Blog Entries
    12
    Chats: 554

    Default

    Quote Originally Posted by MICHAEL View Post


    Ok,,, did the method you mentioned and position of ball as you showed in picture, also followed the timing, and heavy touch, and light touch! Ball looks a hell of a lot better then the ICEMAN method... (:/

    Which looks better LOL.... First picture, or second... thanks for the advice
    now to do the IQ pearl with the 1500!!
    Okay your technique looks alot better.

    Now you will have see how the ball reacts, then adjust from there. If it goes long you might try it without the polish.

    Right handed Stroker, high track ,about 13 degree axis tilt. PAP is located 5 9/16” over 1 3/4” up.Speed ave. about 14 mph at the pins. Medium rev’s.High Game 300, High series 798

    "Talent without training is nothing." Luke Skywalker

  9. #9

    Default

    Iceman what is the deal with that large hole with the spider web / spider in it? Must be a cross hole? But why so big? And it looks like it is drilled to the core?

  10. #10
    Super Moderator
    bowl1820's Avatar
    Join Date
    Dec 2008
    Location
    Central, Florida
    Posts
    6,713
    Blog Entries
    12
    Chats: 554

    Default

    Okay Mike this is my Rotogrip Nomad I did 4 sides with 800 grit (3M 213Q Imperial Wetordry Production Paper P800) about 15-30sec each side, then 2 sides with soft scrub (No other grit before the 800)

    I'll have to make a change though, that paper uses the P-scale like the pads. So it technically coarser than a 1000 pad, but paper doesn't cut the same as the pads do. So you could sub. a 1000 pad for it I believe.

    As you can see though the yours and mine don't look that much different, at least to the eye. If I had used polish, it would be a bit shinier like yours. Also it would depend on how fresh the pad or paper was..

    But it's just a option
    Last edited by bowl1820; 10-09-2013 at 04:21 PM.

    Right handed Stroker, high track ,about 13 degree axis tilt. PAP is located 5 9/16” over 1 3/4” up.Speed ave. about 14 mph at the pins. Medium rev’s.High Game 300, High series 798

    "Talent without training is nothing." Luke Skywalker

Page 1 of 4 1234 LastLast

Bookmarks

Posting Permissions

  • You may not post new threads
  • You may not post replies
  • You may not post attachments
  • You may not edit your posts
  •